The AccuWeather developer team for Android has been keenly watching the development of Jetpack Compose for production. I wanted to start testing Compose as soon as possible to see if it is a valuable tool to build UIs for the AccuWeather app. At the time of writing this article, Jetpack Compose is in Beta, and can’t be used yet for most production apps.
Instead, I decided to refactor the Debug Menu using Compose. Testing Compose on the Debug Menu UI was a good option, since the UI was basic and needed more work.
After using Compose, I found it to be quite a promising tool to build UIs. I only used a fraction of its capability and would need to test it further. I will talk about the testing I completed and some interesting takeaways from my review.
Conditional Backgrounds
The first application I used Compose for was to build a feature for a tester to quickly change conditional backgrounds in the app on the Today screen using the Debug Menu.
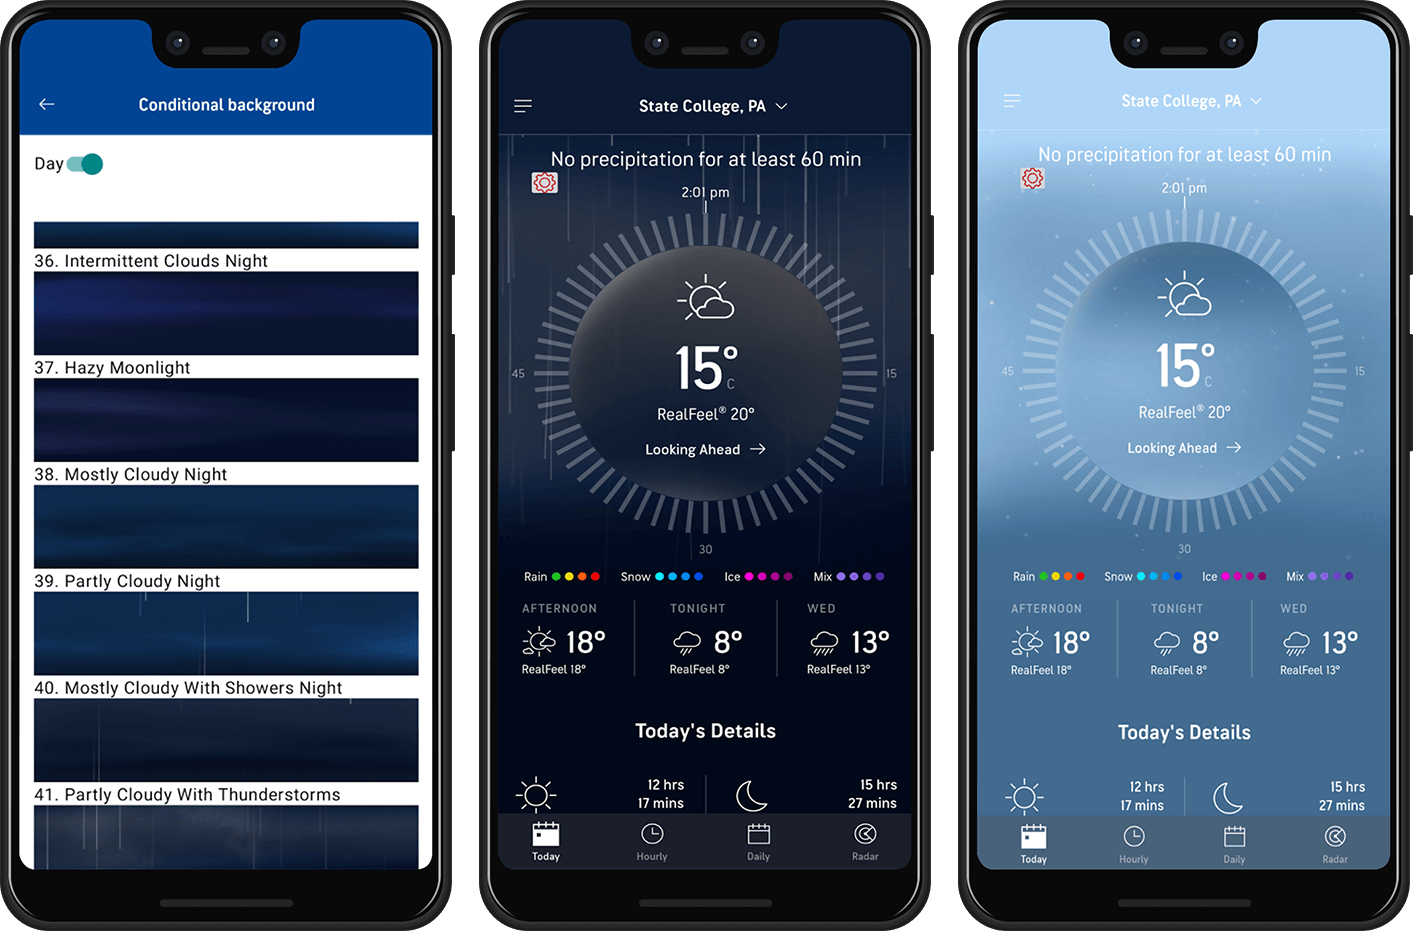
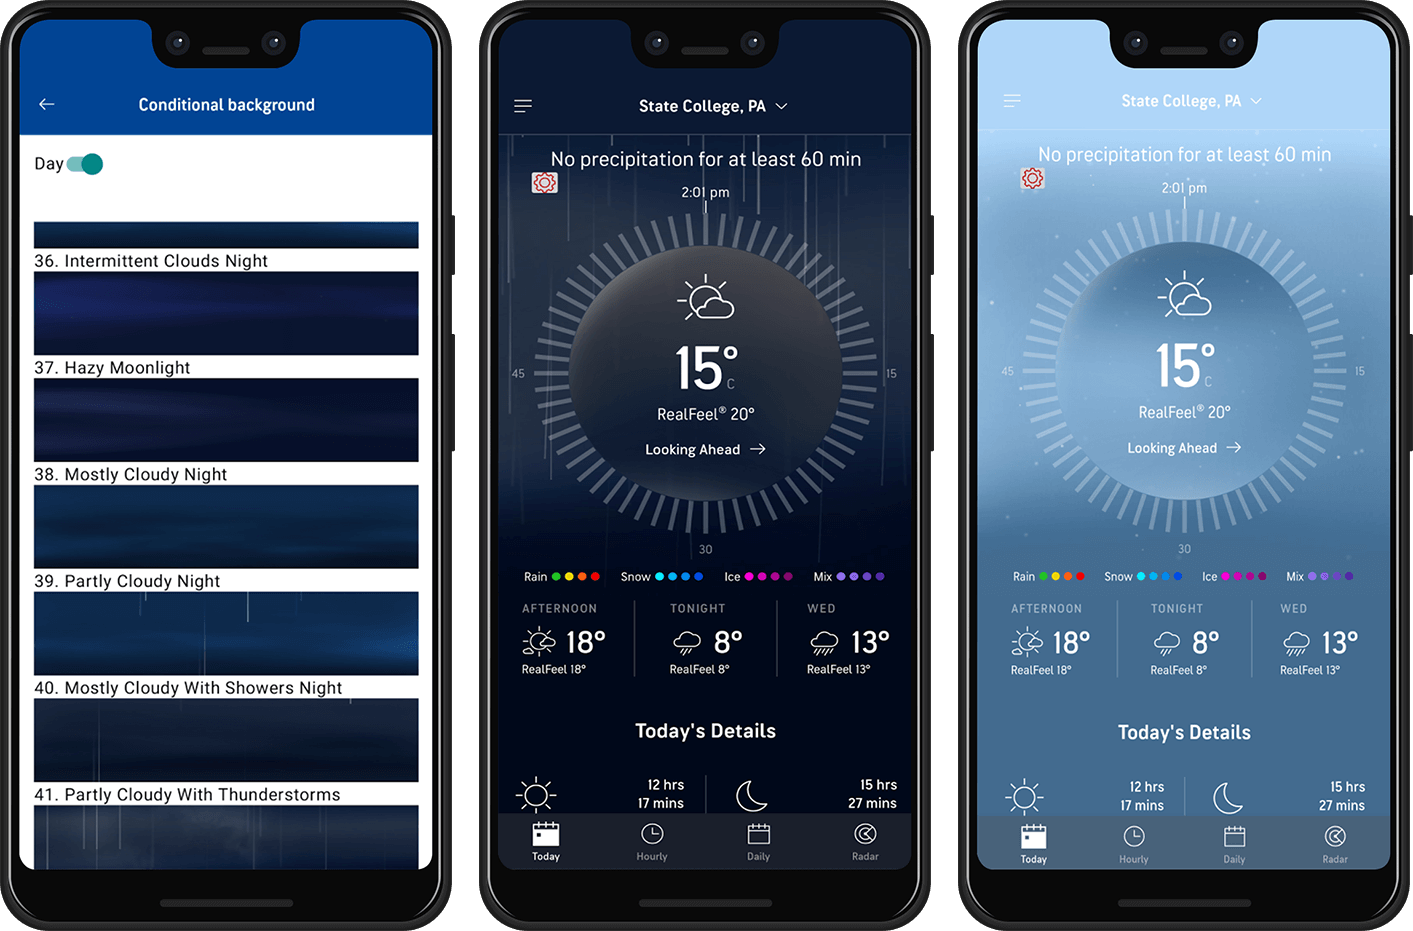
The Accuweather app uses multiple backgrounds on the Today screen depending on the weather. The application contains over forty different backgrounds that reflect the current weather conditions. Screen 1 below shows a few of the backgrounds. The backgrounds are Lottie animation views and they can be combined to better reflect the current weather, for example, combining rainy and lightning backgrounds for some really cool effects.
Screen 2 below shows the ‘partly cloudy with thunderstorms’ and Screen 3 displays the ‘partly sunny with flurries’ conditional background on the Today screen.
With the new feature I built using Compose, the app tester can now quickly switch between conditional backgrounds which saves a lot of time.
Normally I would use a RecyclerView to create this and I would need:
- 1. Custom items
- 2. Adapter
- 3. ViewHolders
With Compose, I just needed to create my custom items and use LazyColumn to create the list of conditional backgrounds.
The code for the RecyclerView and the adapter has been replaced by:

I was stunned when I compiled the code and it actually worked. I didn’t have to use RecyclerView.Adapter boilerplate and now the RecyclerView is one line of code. Amazing!
I thought it would be a challenge to reuse the custom view in Compose, but I was wrong. AndroidView to the rescue!
With AndroidView, I can reuse a view that was created without Compose. I can then set my constraints with LayoutParams and it will be applied to my view as expected. The following code displays the name of the conditional background on top of the conditional background view.

According to the Jetpack Compose documentation, if you want to use UI elements that are not yet available in Compose, like AdView or MapView, you can include an Android View hierarchy within Compose UI . This is useful when reusing custom views that have been designed. The AndroidView composable is used to include a hierarchy or view element.
I was surprised by how easy it is to mix Compose and custom view, and I believe this will be necessary when refactoring the application using Compose. I will need to do it step by step and reuse views that I already have.
Advertisements
Now with the ability to easily change conditional background views for testing, the AccuWeather app has its first feature using Compose.
The next test feature I worked on was to create a Compose view that will take a LiveData variable and recreate (re-compose) when the data changes.
In the Debug Menu, advertisements can be hidden or displayed to show how the app will look like to the user with and without ads. The AccuWeather app shows ads in the app and can be removed if the user pays a subscription fee.
Depending on the value of LiveData, ads will be shown or hidden. I wanted to be able to observe the value of LiveData. One of the main advantages of using Compose to build UIs is that it is compatible with LiveData.
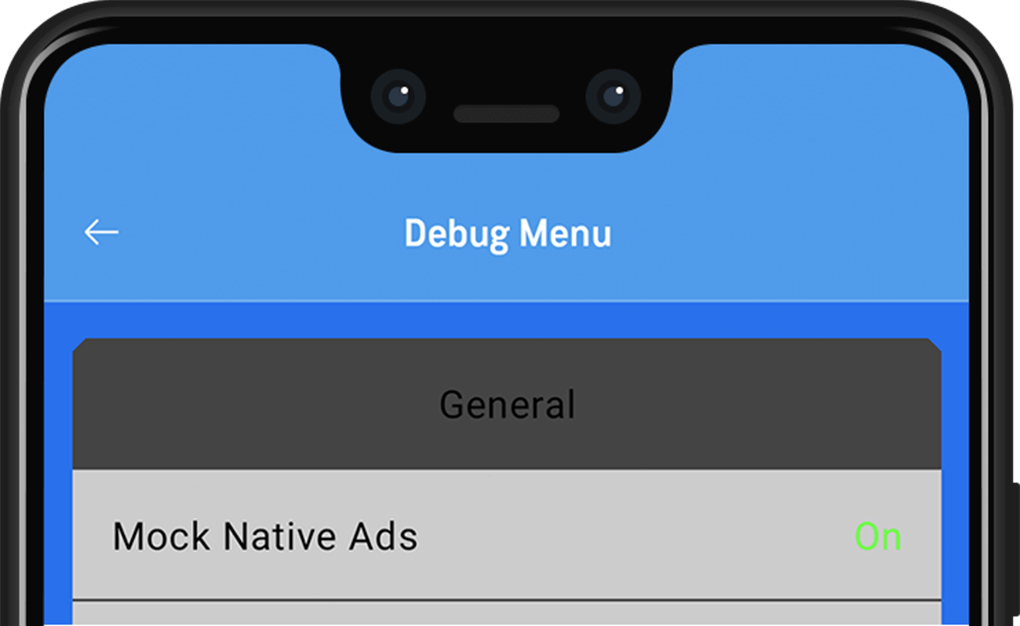
Screen 4 shows the new element that will be displayed. It shows that Mock Native Ads Is ON.
And here is the code for the composable function:
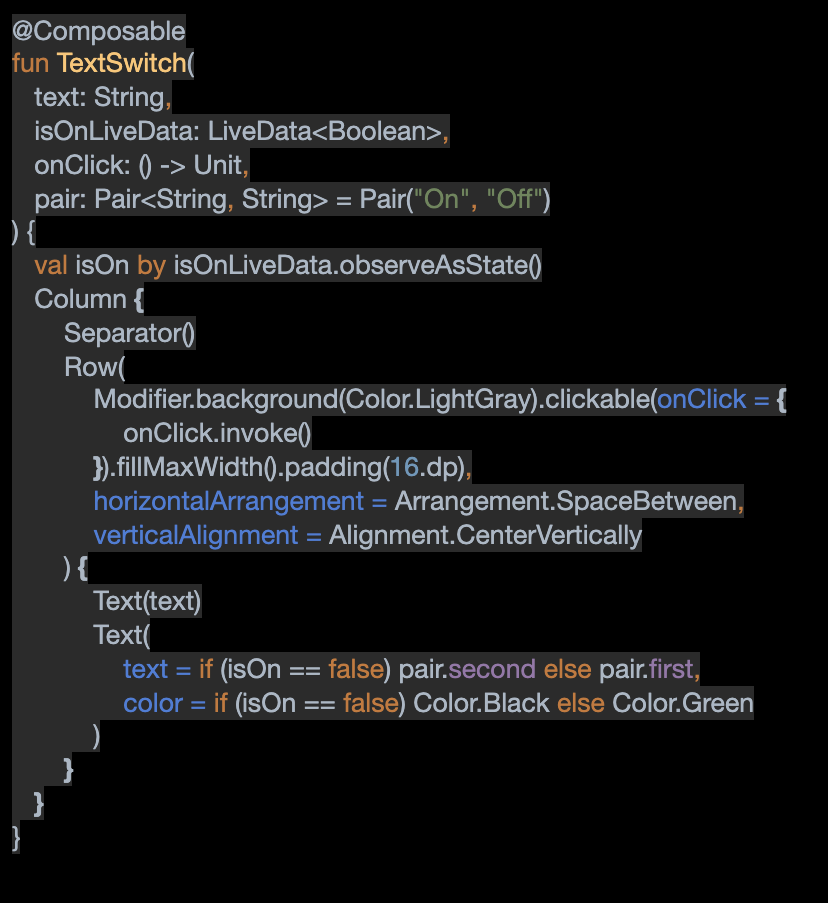
The Debug Menu row ‘Mock Native Ads’ in Screen 4 shows if the ads are on or off in the app and a click on the row will request to update the LiveData. Once the state is updated, the row will be re-composed and will show the new state. Even if this example is really simple, it shows an important aspect of building an application using Compose.
State
Managing state is complicated and it’s a source of bugs. With Compose it’s easier to show consistent state across all screens in the app. I wanted to observe the same reference of the LiveData to all the parts of the application that will react to the content of LiveData. When switching off the ads, all the ads will be hidden, so they should all observe the same live data and this composable function will observe the same LiveData.
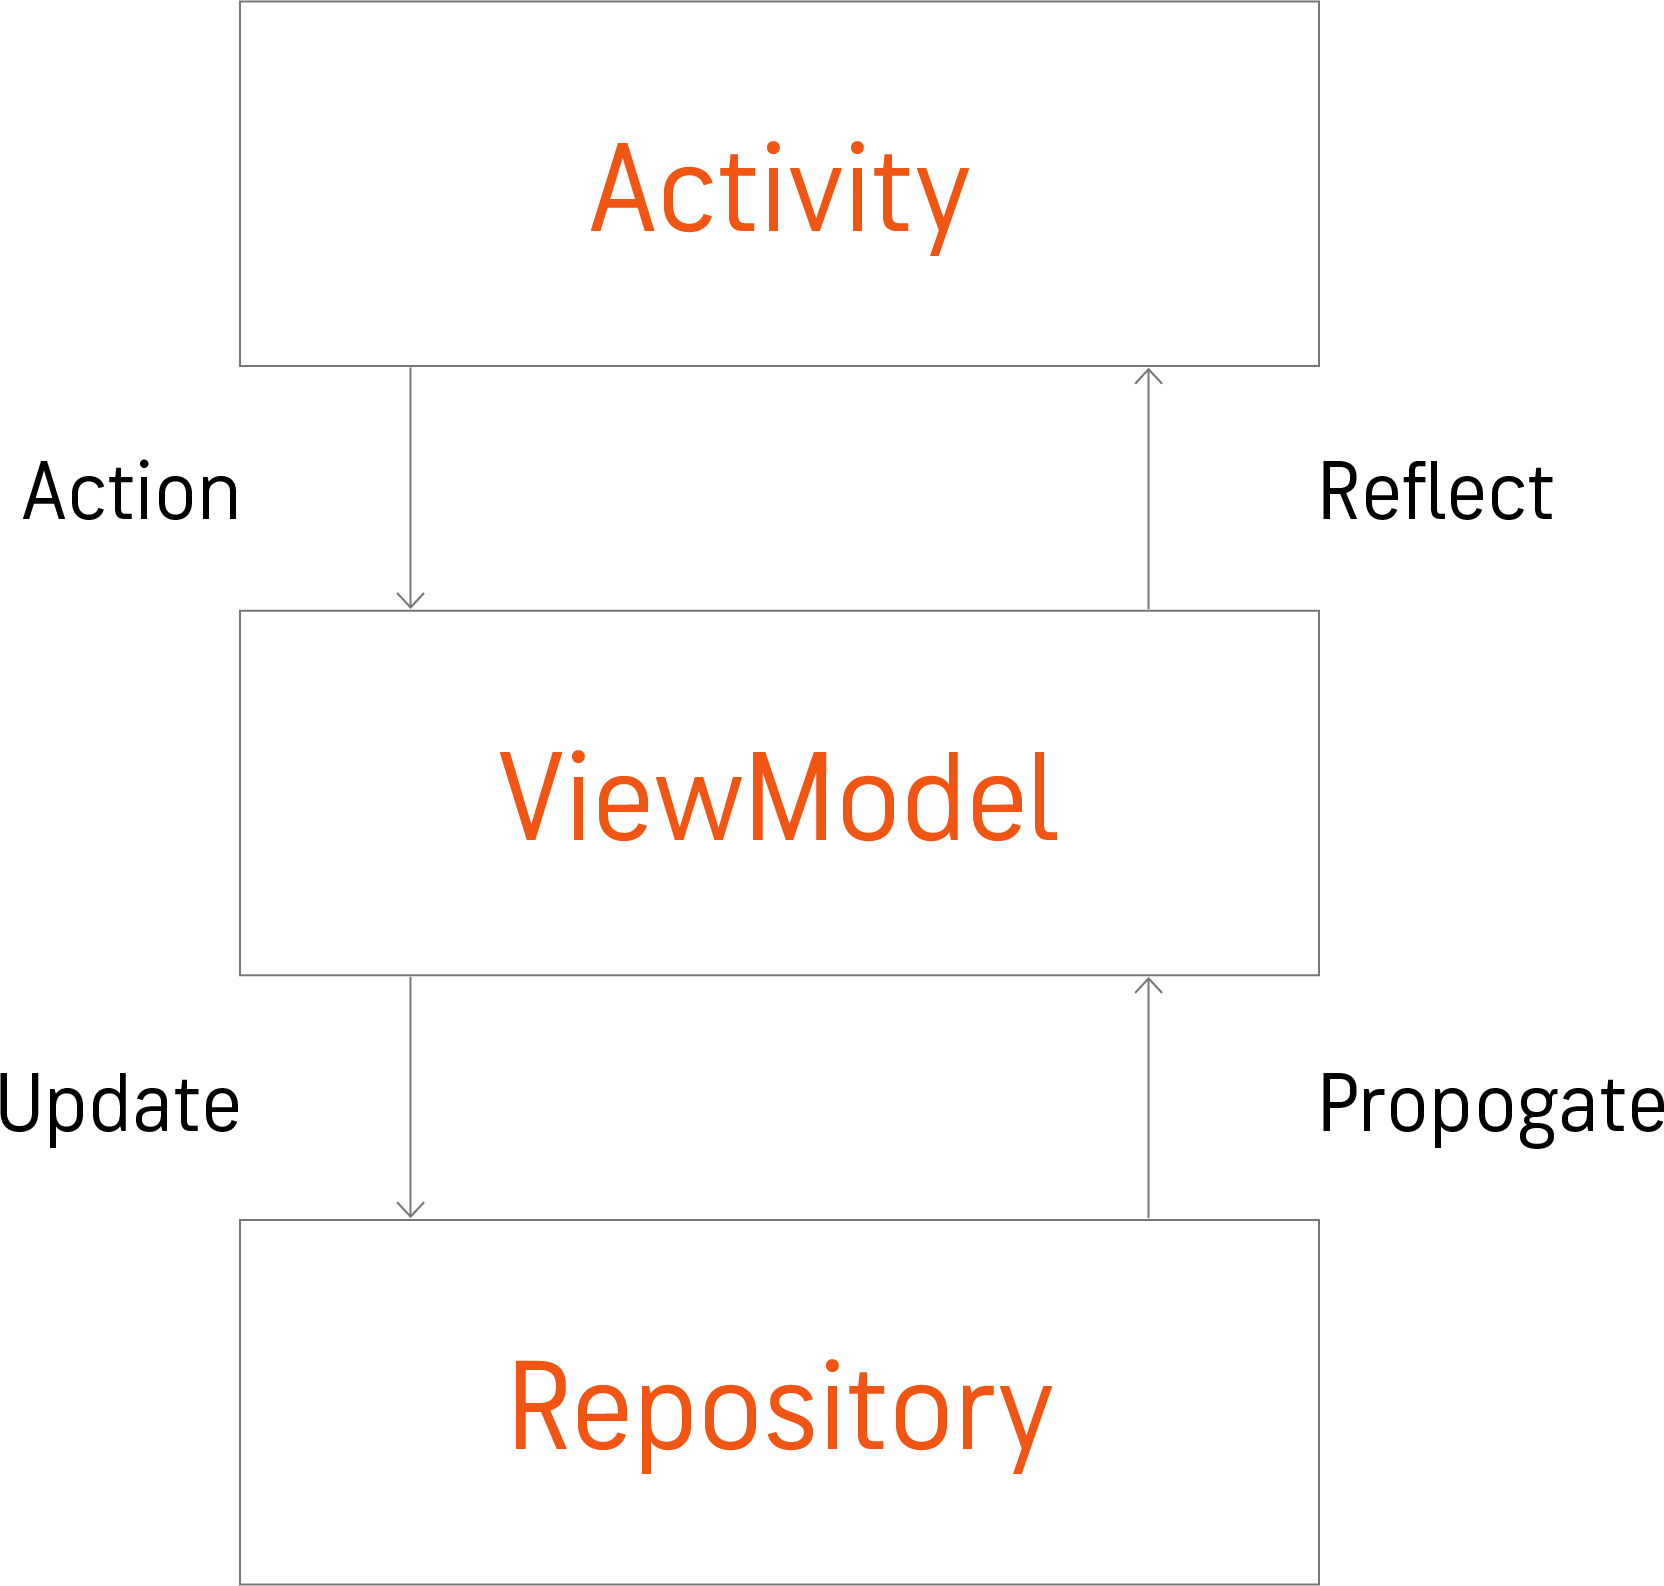
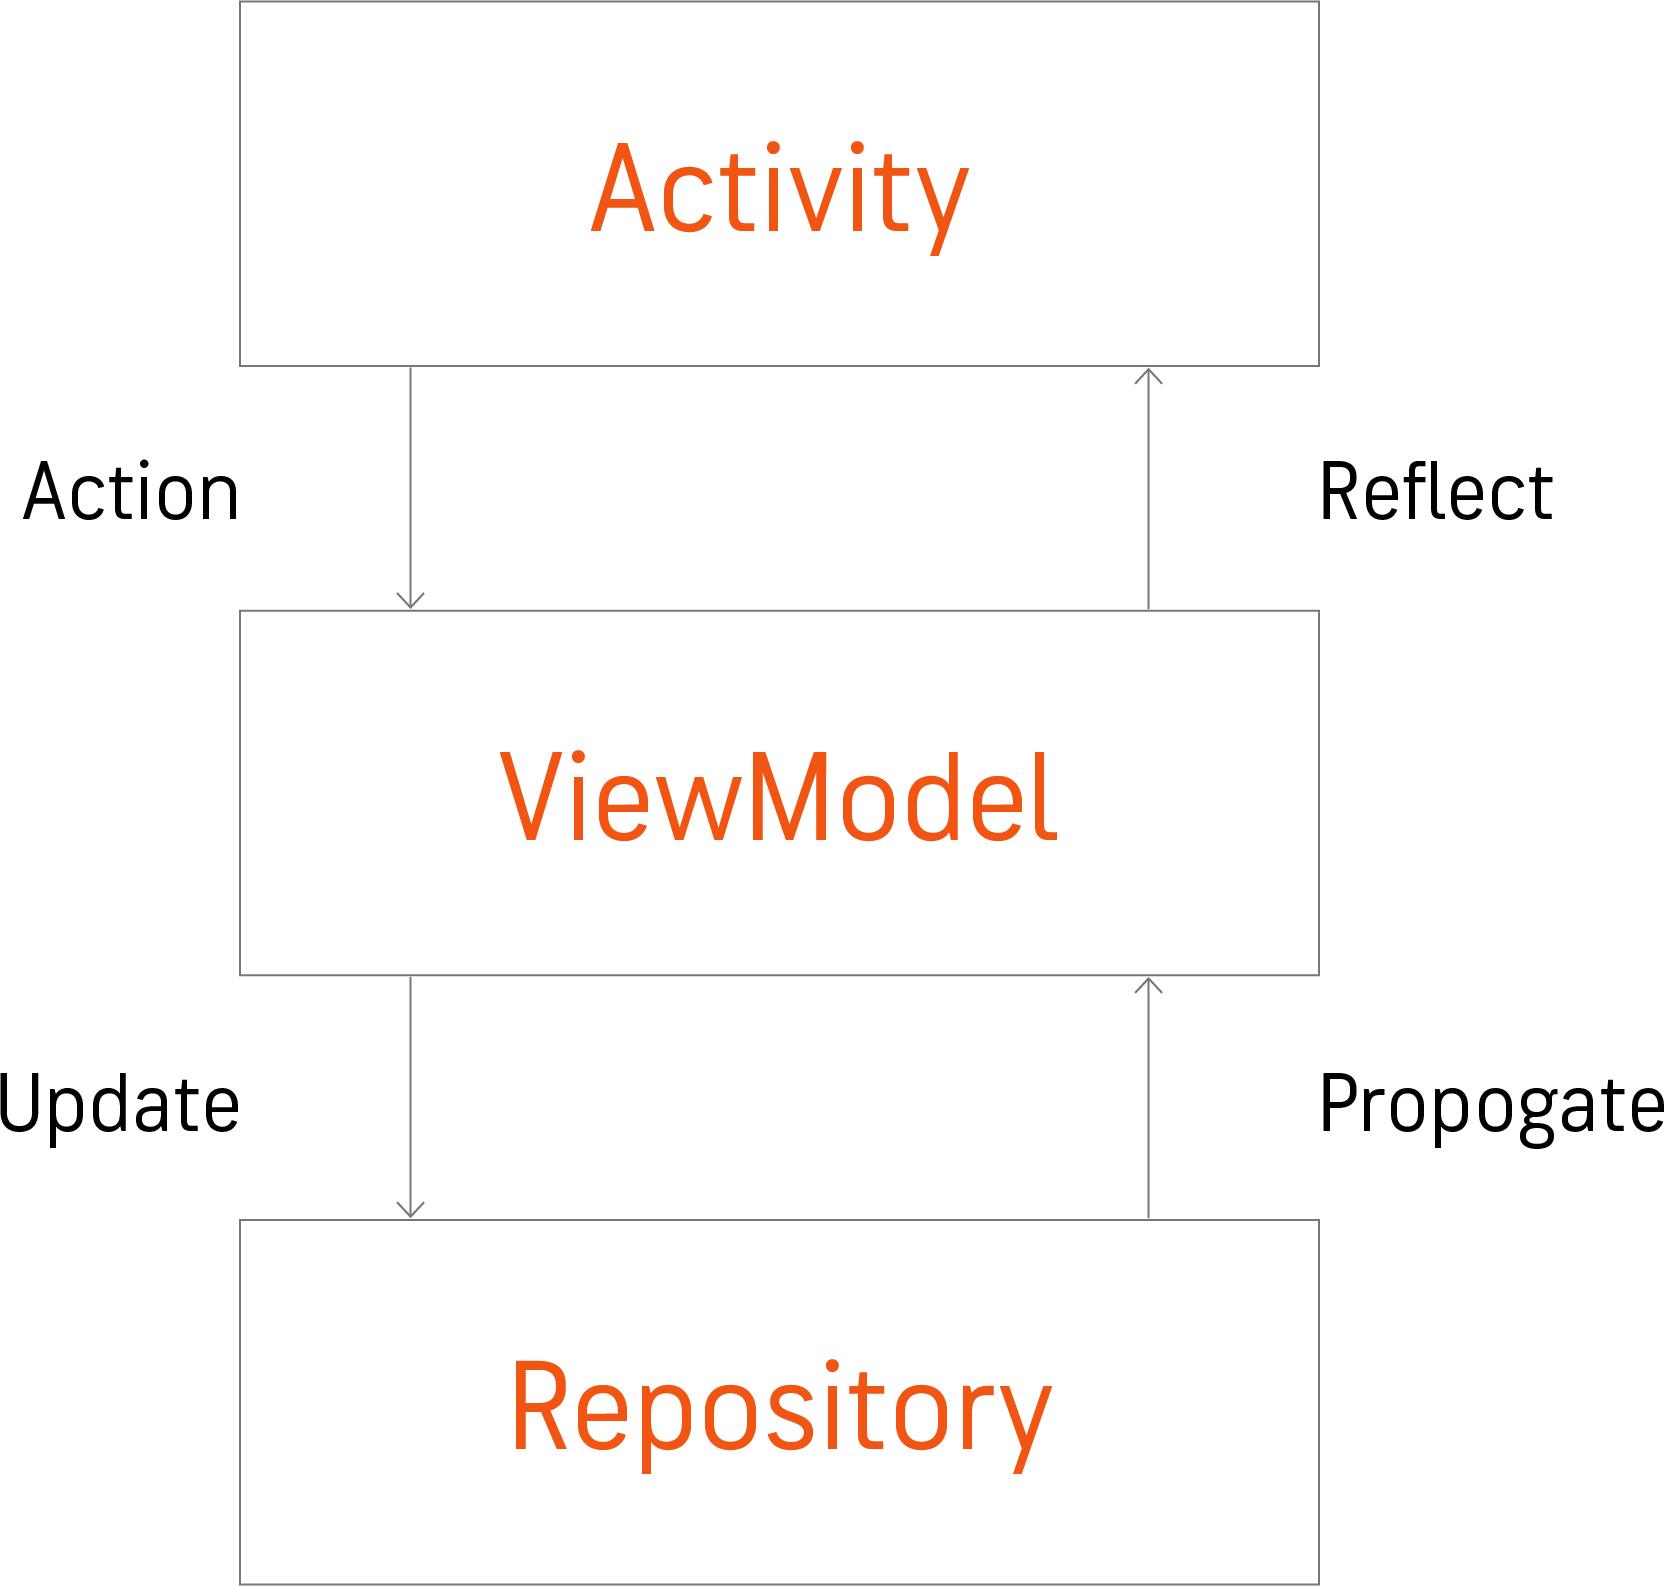
The Accuweather application is built using the MVVM design pattern and here is the schematic that represents the flow of state:
When I click to turn ads on or off, the activity will notify the ViewModel, and the ViewModel will notify the repository to update the LiveData. When the LiveData changes, the state will be propagated back to the view. By doing so I am sure the good state is reflected consistently across the application.
Let’s imagine that for some reason the repository failed to change the LiveData value. If instead of observing the state of the LiveData, I just update the view, it will show the wrong state and that would be a bug.
The good thing is that it’s really easy to enforce good practice with Compose. All I have to do is to pass the LiveData in the composable function and use observeAsState to convert the LiveData to a state that can be observed and re-compose the view when the state changes.
Takeaways
Below are some learnings from testing Compose.
- At the time of writing this article, Compose is in Beta and is not suitable for most production apps.
- Building UIs in Compose is fast and more intuitive than XML and data binding.
- Reusing existing views is easy.
- Enforce good coding practice by forcing view immutability.
- I only used a small fraction of Jetpack Compose capability, and the two features are just a subset of the overall Debug Menu. There is a lot more to consider when using it on the AccuWeather app. I will need to look into ‘Theming’ for example. I will also need to understand how to organize code and make sure to follow Google best practices.
One thing to look into if you are interested, is the pathway that Google created for Jetpack Compose.
-
Here is the link:
https://developer.android.com/courses/pathways/compose
Pathways are created by Google to help develop knowledge and skill.
Google Architecture component is a collection of libraries. Google has been improving its content over the past year. We can clearly see that they are trying to provide a standard to build applications by providing architecture components and code samples that will help developers for Android build better applications.
A key factor missing was how to build better UIs and how to connect the UI to the logic. First, Google suggested using synthetic import but that was quickly deprecated. DataBinding promises to make it easier to connect the logic to the view, but does not offer a good solution to build UIs faster. With Compose, we now have a solution that integrates perfectly with the available libraries of architecture components and the fact that UIs can be built in Kotlin will also make it more intuitive to connect the logic to the view.
I feel that Jetpack Compose will quickly become the standard tool on how UIs are built on Android, and developers should start using it as soon as possible. We are already planning on using Compose in the AccuWeather app for new features later during the year and I'm really excited to start to build awesome UIs with this new tool!

Florian Denu
AccuWeather Android Developer
I am passionate about new technologies and particularly enjoy working on mobile applications.


